9 Handmade Books and What I Learnt Making Them
I have been wanting to learn some new book structures recently. I feel that I have become very reliant on the Secret Belgian Binding technique and although I like that it is hardcover with a protected spine (but also has decorative stitching), I know there are so many other beautiful book structures out there that I haven’t tried yet.
My main goal of this exercise was to find a structure that
worked for multiple pages, either as single signature or multiple signatures,
but was still decorative. I made a series of ‘experiment’ books, first drafts
that weren’t particularly neatly made, but were designed to give me an idea of
how they would look when assembled and if they would work for what I wanted.
I learnt the value of taking a bit more time to make the book properly – you can’t get an idea of what something will look like if you don’t make it how it is supposed to be made! – and now have a better idea of how some of the book structures I have seen photos of, come together.

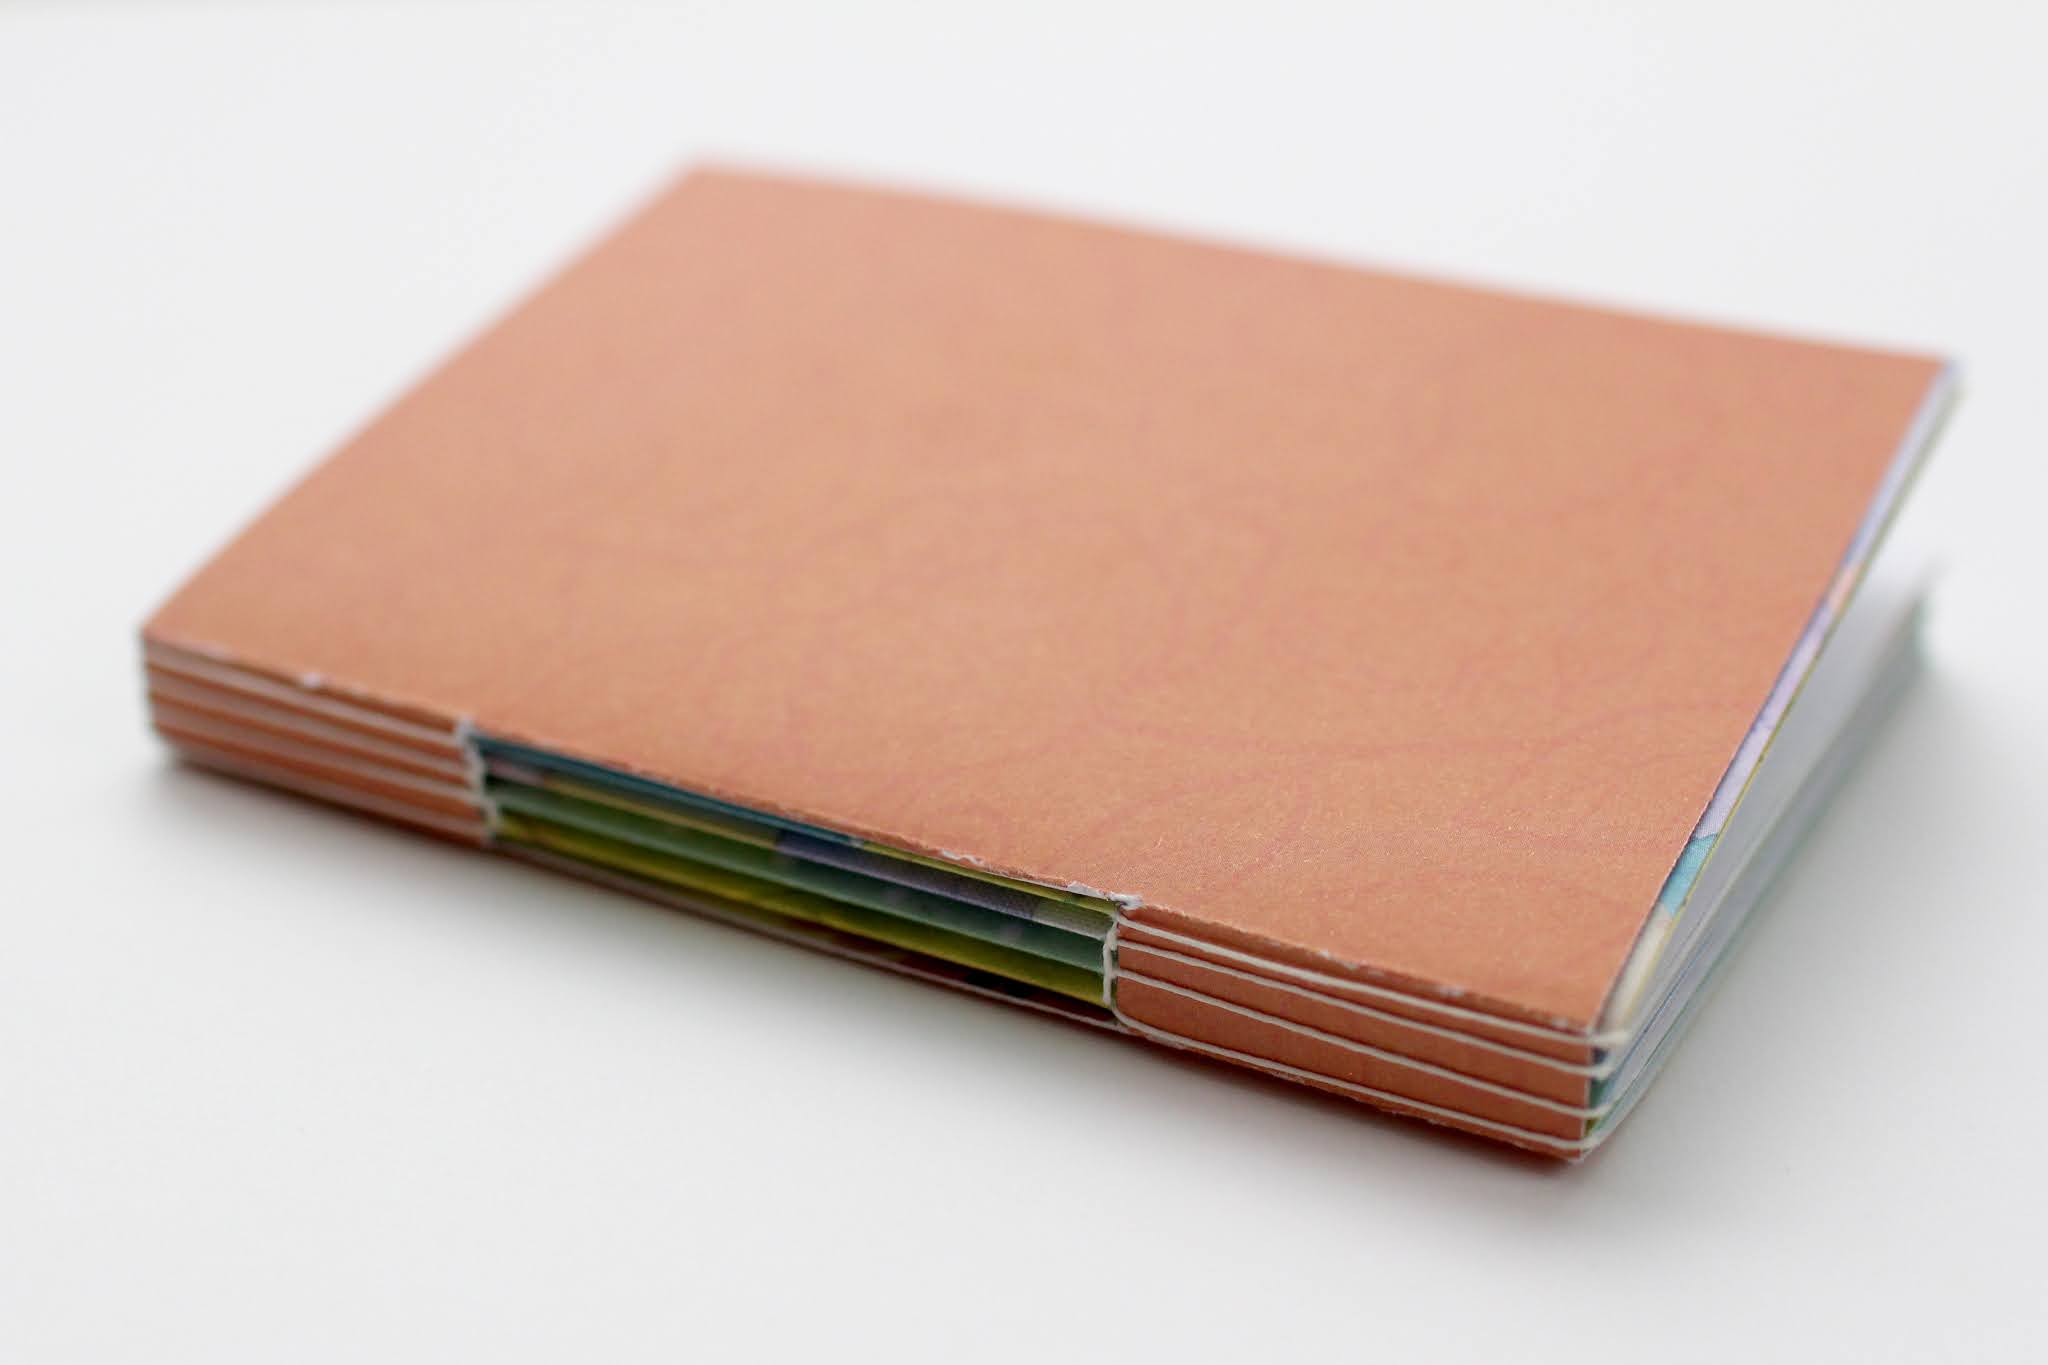
The first book was my attempt at a recreation of a book I’d seen on Pinterest, but without me fully appreciating the importance of why the book had been made the way it was! I covered the cover boards in my painted papers and made the spine piece out of black card. The text block was stitched together using a combination of French link and kettle stitches.
The problems I encountered are two-fold. One, I should have
glued the signatures together after binding, because although they were held
together tightly at the top and bottom, the French link stitch was too loose in
the middle.
Two, I have since discovered this style of binding that I
was supposed to be making is known as ‘Dos rapporté’ binding, created by
Benjamin Elbel (bookbindingoutofthebox.com) and the shape that the spine piece
is folded into is the most crucial part of the whole thing and I missed it! I
folded the card piece in two places, rather than four, and as a result, the
spine couldn’t flex. This has led to it becoming partially unstuck from one
side. It is possible to make a book structure like this, but by only gluing the
card onto the cover boards right at the outer edges of the card, allowing the
spine to move.


The next book I made had an accordion fold spine, with
signatures stitched into the valleys and a card casing around the spine. Whilst
this looks nice from the outside, the accordion is not held at all and so the pages
‘fall out’ of the cover. This is not a practical choice for what I wanted, but has
potential for future projects. In an attempt to find out if I’d done something
wrong, and if there was a better way to secure the book, I have found a few
other methods that would perhaps suit better, which I will try out in due
course.


The stitching in this case was a bit trickier. It was hard
work to stitch through the holes in the spine, particularly when they had already
been stitched through, and even more so towards the end when there was a lot of
tension.
The only downside I found was the large gap between the two
signatures inside the book. This is obviously a feature of the book and without
risking having the holes too close on the spine, there isn’t much that can be
done about it. It is a feature of the book. Adding more pages into the
signatures might work, but then that runs the risk of not letting the book to
close properly.


I am glad I tested it first or else I would have been very
disappointed. I realised that I should have been using a thicker thread (I was
using a 2-strand linen thread, but a 6-strand embroidery thread might have been
better), but more crucially, I realised that due to the nature of chain stitch,
there needs to be a lot of looseness in stitches to give form to the chains,
but that means looseness in binding, and that isn’t really what you want in a
secure binding!


I also wrapped the cover boards in paper and used a piece of
fabric on the outside and inside of the spine, to hold it together. I really
liked how this looked, particularly with the contrast in colour.
Something else I have thought about changing when making this book again, is the number of pages in the signature. Although the spine could accommodate the number of pages I used and still lie closed, I didn’t really like how the book looked with such a thick signature. I’m sure this is mostly just personal preference, but there is something about it that just looks messy. I was using 140gsm weight cartridge paper, so I think lighter weight paper might look better, and still allow for more pages.


I used a long stitch along the length of spine that is held
down at the other holes along the spine (I’m not sure what the name of this stitch
is).
I really love how this book turned out. My only concerns about it are that the fabric I used was a bit thin and it was easy to see the difference in colour of the Tyvek and board, which is why the handmade paper was necessary. Also if I want to use the handmade paper again, it needs more contrast between the fabric and paper colour to make the book ‘pop’ (like in the previous example when I used black cover boards and light fabric on the spine).


I used a piece of card, with slits cut into the spine, which
I then stitched back and forth through, adding signatures individually. This
did a lot of damage to slits where needle passed through and I found it very difficult
to make the rows of stitches for the signatures lie an equal distance apart on
the spine.
What I find the most frustrating about this is that I just
can’t see how this is suppose to look neat! Should I have used thicker card? A
smaller needle? I think it is fair to say I won’t be trying this binding again!


I do like the idea of this binding, particularly if
decorative papers (or contrasting papers) are showing through the hole, and
maybe it would be more successful if I had made a hard cover instead, but I
found the binding quite loose which gave the book a lot of movement, and I’m
not sure how to make the binding tighter or if that is just the nature of it.

I think I definitely need practice to work out how best to
fold the tabs before the final assembling, because getting sharp folded around
the stitched pages was too hard. I also think that the paper I used on the
cover wasn’t interesting enough (I used tea dyed card which had quite a flat
colour) and I should have used something with more contrast to make it ‘pop’.


Hey, I really enjoyed reading this article. Wondering if you pursued book binding methods. I just pulled out a hand made book that was given to me yrs ago as a gift. It is so beautiful. I'd love to send you a picture of it. Email me if interested. There's no signature on it but the details are gorgeous. The cover has been embedded with cording to create a design and a small window exposes some raw fibres. Inside the back cover a window exposes a portion of a feather that you just want to touch for a new experience of feeling texture. How we feel when we find a feather and run our fingers over it. Special. I hope you've continued your book binding experiences.
ReplyDeleteI just found your Etsy shop. I can see your great progress and gorgeous work. Beautiful books.
DeleteI just want to know what's a book price
ReplyDelete